Seafoam Islands in Fire Red: routes, items, and the Articuno chase
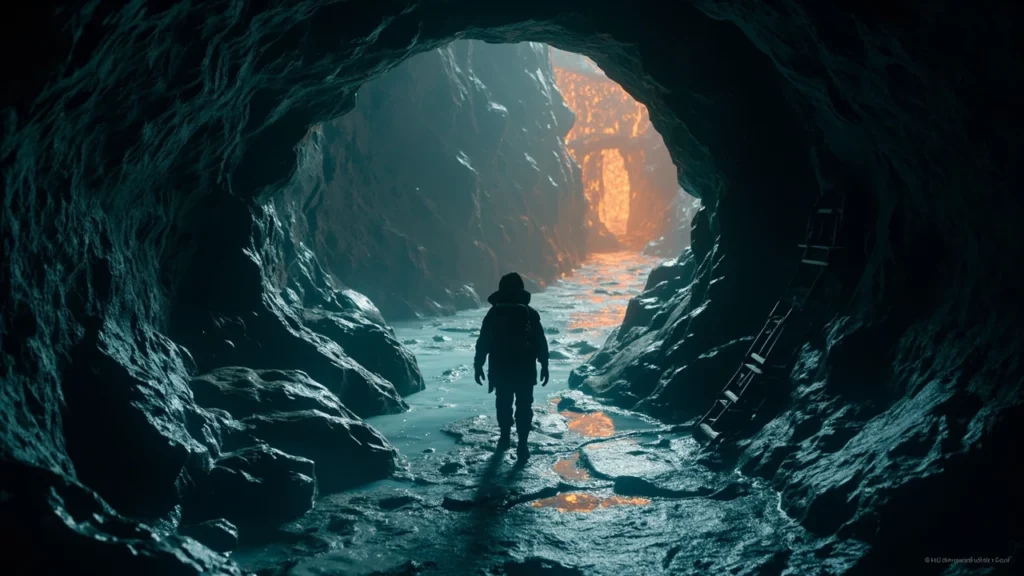
Seafoam Islands Fire Red: a cave that doubles as a routing puzzle
Seafoam Islands Fire Red is the multi-floor cave between Route 20 and Cinnabar Island, and the only place in Pokémon FireRed and LeafGreen where you can catch the Legendary Bird Articuno. The dungeon looks simple on the overworld map, but inside it stacks five floors on top of each other, hides the path forward behind several Strength boulder puzzles, and saves its strongest encounter for the deepest level. The good news is that nothing in the cave is random about your progress: every floor has exactly one route down, every puzzle has a single correct push order, and the items are placed at the same coordinates in every copy of the game.
This walkthrough covers what to bring, how to read the floor maps, where the boulders need to land, which items are worth picking up, and how to approach the Articuno fight without wasting your one Master Ball or your best Ultra Balls. It is written for a player who already has a working team around the mid-game level curve and is moving west from Fuchsia City toward the volcanic island that holds the Pokémon Mansion and the Cinnabar Gym.
What Seafoam Islands actually is in the Kanto map
Seafoam Islands is a pair of landmasses connected by a cave that crosses the sea channel between Route 20 on the east and Cinnabar Island on the west. In the Pokémon FireRed and LeafGreen remakes it sits in roughly the same position as it did in the original Red and Blue, but with a few small changes to items and encounter tables to fit the Generation III stat changes. The cave is on the way to three things players usually want at this stage of the game: the Cinnabar Gym, the Pokémon Mansion, and the Power Plant on a side trip further north.
From a design standpoint, the dungeon is a textbook “gate cave.” It does not introduce a new ability, it does not host a Gym Leader, and it does not hide a story beat. It is a routing puzzle that forces you to move boulders into specific holes so that you can fall through to the next floor. The reward for solving the routing puzzle is the encounter with Articuno on the lowest level. If you are skipping the legendary, the cave is still mandatory because it is the only way to reach Cinnabar Island by land.
The Seafoam Islands connect to the rest of the world through two entrances only. The east entrance opens from Route 20, on the strip of land south of Fuchsia City. The west entrance is on Cinnabar Island, on a small beach that leads directly into the Pokémon Mansion’s lower yard. There is no shortcut and no fly point inside the cave, so once you enter, you should plan for the full descent before you commit.
Prerequisites before you walk into Route 20
Seafoam Islands is not a difficult dungeon by level, but it does require a small set of field abilities and survival tools that the game does not telegraph. The first time a player enters the east entrance, they are usually sent back to the Pokémon Center by wild encounters because they forgot to bring one specific HM move.
Make sure your party has these before you enter:
- Flash, so you can see more than a single tile around your character on every floor. The remake keeps the classic darkness behavior and only lights the screen if you use the field move.
- Strength, to push the boulders that gate every transition between floors. You also need the fourth badge to use the field move outside battle, which you get from Koga in the Fuchsia Gym.
- Surf, if you want to skip the longer land path through Route 20 and arrive at the east entrance from the water. The cave does not require Surf inside its floors.
- A Repel supply, or a lead Pokémon above level 30, to keep the wild encounters from interrupting the boulder puzzles.
- A full healing kit, including at least one Revive and one Max Repel, because the lower floors spawn the tougher encounters.
Two HMs are the only mandatory field moves for the cave. If you do not have both Flash and Strength, you should clear Koga’s Gym first and route back to the cave afterward. The wild Pokémon inside are mostly water and ice types, so a grass or electric attacker will sweep most random encounters but will not help you push a boulder.
Floor-by-floor layout and routing
The cave has five floors: 1F, B1F, B2F, B3F, and B4F. The east entrance drops you on 1F. The west exit on Cinnabar Island is reached by climbing back up from B4F. Each floor has a small number of boulders, ladders, and items, and the trick is that some boulders need to fall into holes on the floor above you before the floor you are on has a usable path downward.
The following table gives a one-screen summary of every floor and the action that matters on it. Use it as a checklist while you play and refer back to it if you get turned around.
| Floor | Main puzzle | Key items | Wild encounter risk |
|---|---|---|---|
| 1F | Push the entrance boulder up four times and left once into a hole | Ice Heal on a small island to the northwest | Zubat, Golbat, Psyduck, Goldeen, Magikarp near water |
| B1F | Push the second boulder up once and left twice into a hole | Revive on the upper platform | Same pool, plus Seel at higher encounter rates |
| B2F | Push the third boulder left twice into a hole that opens B1F | Full Heal, optional Ether | Seel and Psyduck dominate the pools |
| B3F | Connect the upper and lower halves through the now-open B1F ladder | Hyper Potion, Rare Candy | Tentacool appears in the deeper water |
| B4F | No boulder puzzle; the legendary encounter sits in the southwest cave | None beyond Articuno | Highest level pool, mostly Tentacool and Seel |
Each floor reads as a small, semi-detached room when you first arrive, because the holes that lead to the next floor are hidden until the boulder above falls through. If you entered from the east and are on 1F, the visible ladder to B1F looks like a dead end until you push the entrance boulder. Once that boulder falls, the ladder becomes a usable descent.
Floor 1F: the entrance and the first push
From the Route 20 entrance, head straight into the cave and use Flash as soon as the screen darkens. The first boulder sits two tiles north of your starting position. Use Strength to push it up four tiles so it lines up with the hole that drops to B1F, then push it one tile to the left so it falls through.
After the boulder is gone, walk back to the south side of the room and take the stairs to the upper platform where the Ice Heal is sitting next to a small patch of ice. Do not take the ladder near the boulder; it is the same ladder that was blocked until the boulder fell. With the path open, descend to B1F through the now-clear ladder.
Floor B1F: the upper platform and the second boulder
B1F has two halves in the original geometry: a north platform accessible by stairs from 1F, and a south platform that holds the next boulder puzzle. After you descend the ladder, walk up the stairs to the Ice Heal area you already know from 1F, then move right and down the next set of stairs to reach the southern half of B1F.
Here you find the second boulder sitting between the south path and a hole. Push it up one tile, then left twice, so it falls through the hole. The hole opens the path to B2F for the next player who descends, and once the boulder is gone, the south platform connects cleanly to the ladder that leads to B2F. On the way, grab the Revive from the small platform above the stairs.
Floor B2F: the sealed room and the third push
B2F looks like a dead end the first time you see it. There is a single boulder at the far end of a narrow corridor, and the only ladder back up to B1F sits behind you. Push the boulder left twice so it drops into the hole at the end of the corridor. The fall is loud and obvious, and once the boulder is in the hole, the upper part of B1F is now connected to the lower part of B1F.
You can confirm the change by climbing back up the ladder and walking left, then down the ladder you originally ignored. A new section of B1F is now reachable, and it is the section that contains the path to B3F. The item to grab on B2F is a Full Heal in the south corridor, with an optional Ether on the side path if you used your field moves to reach the lower floors cheaply.
Floor B3F: connecting the upper and lower halves
B3F is a transitional floor. The upper part is a small rectangular room with stairs that lead back to the lower part of B1F, and the lower part contains the last set of stairs before B4F. Walk down the stairs from the lower B1F area to reach the upper part of B3F, then go down again to reach the lower part where the next ladder is waiting.
There is no boulder on B3F. The puzzle has already been solved by the time you reach it. Pick up the Hyper Potion and the Rare Candy on the lower platform, then take the south stairs to B4F. From a design standpoint, B3F exists to give the player a moment to heal and save before the Articuno encounter, because the next floor has no item to recover from a bad fight.
Floor B4F: the Articuno chamber
B4F is a single rectangular cave with no exits other than the ladder you came in by and the floor that leads back to Cinnabar Island. Articuno waits in the back-left corner of the room and is the only scripted encounter on the floor. Save the game before you step into its line of sight, because if you defeat it, the only other Articuno spawns are from a post-game event, not the regular Seafoam encounter table.
You have two options for the catch. If you still have your Master Ball, use it on the first turn; Articuno’s catch rate is low enough that even strong combinations of Ultra Balls and status conditions can fail repeatedly. If you are out of Master Balls, put Articuno to sleep with a Pokémon that knows Spore, Hypnosis, or Sleep Powder, drop its HP to the red bar without knocking it out, and start throwing Ultra Balls. The fight is detailed in the encounter section below.
Items you can find and which ones are worth detouring for
Most of the items in Seafoam Islands are survival tools, not rare rewards. The dungeon is generous with healing and reviving items and stingy with battle items, which makes sense because the dungeon is meant to be a routing puzzle and a single legendary encounter, not a treasure run. The table below breaks down what each floor offers, where it sits, and whether it is worth picking up given that the Pokémon Mansion and Cinnabar Gym are right after the cave.
| Item | Floor | Location detail | Pickup priority |
|---|---|---|---|
| Ice Heal | 1F | Upper platform, northwest corner | Medium, useful for the Ice Beam user you may want for Cinnabar |
| Revive | B1F | Upper platform, on the right of the second stairs | High, Articuno and the Cinnabar Gym both benefit from a backup |
| Full Heal | B2F | South corridor, end of the hallway | Medium, status healing is rare at this stage |
| Ether | B2F | Side platform reachable by the second stairs | Low, only useful if you used several field moves already |
| Hyper Potion | B3F | Lower platform, before the south stairs | High, pre-Articuno heal |
| Rare Candy | B3F | Lower platform, opposite the Hyper Potion | High, level curve for the next gym |
| Nugget | B4F | Hidden item in the southwest corner near Articuno | Medium, sells for 5000 in the original and is a nice money pickup |
The Nugget on B4F is a small but real reward. It is hidden under a rock tile, so use the Itemfinder or its Generation III equivalent, then pick it up before engaging Articuno. If you are planning a Nidoking or Nidoqueen run, the Nugget lets you bank enough for the coins needed to buy the evolution stones in the Celadon Department Store later.
Wild encounters by floor
Seafoam Islands uses the same general encounter pool across all five floors, but the rates shift as you go deeper. The top two floors are mostly flying and water types that you have already seen on Route 20, while the bottom three floors increase the rate of the more useful ice and water types that you may not have in your party yet. The table below summarizes the encounter pool for FireRed and LeafGreen, which is identical between the two versions.
| Encounter | Type | Approx. level range | Where it appears |
|---|---|---|---|
| Zubat | Poison, Flying | 22 to 28 | 1F and B1F, common in the dark corridors |
| Golbat | Poison, Flying | 24 to 30 | 1F and B1F, less common than Zubat |
| Psyduck | Water | 22 to 30 | All water tiles, average rate |
| Goldeen | Water | 22 to 28 | All water tiles, common |
| Seel | Water | 22 to 32 | All water tiles, more common in lower floors |
| Magikarp | Water | 5 to 10 | Fishing tiles, any floor |
| Horsea | Water | 22 to 28 | Fishing tiles, lower floors |
| Krabby | Water | 22 to 28 | Fishing tiles, lower floors |
| Shellder | Water | 22 to 28 | Fishing tiles, rare |
| Tentacool | Water, Poison | 26 to 32 | B3F and B4F, common |
The encounter list is a useful XP source for the pre-Cinnabar team. Seel is the standout pickup, because it evolves into Dewgong and learns Rest, Ice Beam, and Aurora Beam, all of which are useful against the Fire-types that wait in the Cinnabar Gym. Tentacool on the lower floors is a less obvious pick but evolves into Tentacruel, which is one of the best special walls in this part of the game.
Step-by-step walkthrough from Route 20 to Articuno
Use this sequence as a single pass through the cave. Each step assumes you entered from the east, are playing in FireRed, and are not hunting for a specific wild Pokémon on the way down.
- Save the game at the Pokémon Center on Route 20, just south of Fuchsia City. Make sure the party is fully healed and you have at least one status healer on the lead.
- Enter the east entrance of Seafoam Islands. The first thing you should do is use Flash if you have a Pokémon with the move. The screen will go from a small circle of light to a fully lit cavern.
- On 1F, walk two tiles north to the first boulder. Push it up four times and then left once so it falls into the hole.
- Go back to the south of the room and walk to the upper platform by the small island. Pick up the Ice Heal.
- Return to the ladder that was blocked by the boulder. It is now open. Take the ladder to B1F.
- On B1F, walk up the stairs, then right, then down the next stairs. The second boulder is in front of you. Push it up once and left twice so it falls into the hole.
- Pick up the Revive from the platform above the second stairs.
- Continue south through the cleared corridor and take the next ladder to B2F.
- On B2F, push the boulder in the back corridor left twice so it falls into the hole.
- Climb back up the ladder to B1F, walk left, and take the ladder you originally ignored. You are now in the new south section of B1F.
- Walk down the stairs, then down and right to the next stairs. Pick up the Revive on the upper platform as you pass it.
- Go up the stairs, then take an immediate right to find a Revive pickup. Continue south to the next ladder, which leads to B3F.
- On B3F, walk up the stairs to the upper platform. Pick up the Hyper Potion and the Rare Candy on the way.
- Take the south stairs from the lower part of B3F to reach B4F.
- Before engaging Articuno, use the Itemfinder to find the hidden Nugget in the southwest corner of B4F.
- Save the game, then step into Articuno’s line of sight to start the encounter.
If you are playing LeafGreen, the steps are identical. The encounter pool and the items are the same between versions, so nothing in the routing changes. The differences show up only in the version-exclusive Pokémon on the same routes outside the cave.
How to approach the Articuno fight
Articuno is a pure Ice and Flying Legendary with a stat spread that focuses on high special defense and good speed. Its level is fixed when you reach the chamber, so the fight difficulty depends almost entirely on the level of your party and the lead you bring in. The simplest reliable strategy is a sleep lead, a damage lead, and a clean-up catcher.
For the sleep lead, the safest choices in this part of the game are:
- A Butterfree with Compound Eyes and the move Sleep Powder. Compound Eyes raises the accuracy of sleep moves enough that Articuno cannot wake up on the first turn.
- A Parasect with Spore, which has perfect accuracy but is fragile and may not survive a retaliating Ice Beam.
- A Hypno with Hypnosis, which has lower accuracy but can also act as a heal battery with Rest and Dream Eater.
For the damage lead, the goal is to reduce Articuno’s HP to the red bar without knocking it out. The best candidates are physical attackers with neutral or super-effective moves, because most of the special attackers in this part of the game are weak to Articuno’s Ice Beam. A good rule of thumb is to switch in a Pokémon with False Swipe if you have one. False Swipe is a Generation III tutor move that exists in the post-game and is not available in the natural Seafoam play through, so most players will use a regular damaging move and stop short of a finishing blow.
For the catch, use Ultra Balls in batches. Throw one every turn that Articuno is asleep and has not used a move that wakes it up. If the ball shakes three times and releases Articuno, repeat. The average number of Ultra Balls needed to catch a sleeping Articuno in the red bar is between four and seven. If you have a single Timer Ball, it can outperform Ultra Balls after the fifth turn, because the catch bonus from elapsed time stacks with the sleep bonus.
If you still have the Master Ball, use it on the first turn. The Master Ball guarantees a catch regardless of HP, status, or Articuno’s level, and there is no other encounter in the natural FireRed play through where you need it more. The only reasons to save the Master Ball are to test the encounter without it, or to role-play a no-Master-Ball run for an extra challenge.
Common mistakes and how to recover from them
Most Seafoam Islands Fire Red problems fall into a small set of predictable categories. The cave is short, so a mistake usually costs the player a small amount of progress rather than the whole run, but a few of the mistakes can soft-lock the player if the puzzle is read incorrectly.
The most frequent mistakes, in the order you are most likely to make them, are:
- Forgetting Flash, which leaves the cave dark and makes it easy to push a boulder in the wrong direction. Use Flash at the entrance and confirm the screen lights up before you start moving boulders.
- Pushing a boulder in the wrong direction so it lands in a corner instead of a hole. The fix is to walk around the boulder and push it from the other side, or save and reload if the layout has been broken.
- Talking to Articuno without saving, then defeating it by accident. The fix is to save before every legendary encounter, including this one, so a knock-out is recoverable.
- Running out of Repels and being forced to fight every encounter. The fix is to use Repels in 10-step batches, or to set a lead Pokémon above level 32 so wild encounters are skipped automatically.
- Exiting the cave through the west door and realizing the player left an item behind. The fix is to re-enter from the Cinnabar side and climb back up to the floor where the item was. The two entrances share the same internal floors, so the routing is reversible.
If you are completely lost in the cave, the easiest reset is to use an Escape Rope. The rope returns you to the last entrance you used, which means you can either re-enter from the east or climb down to B4F again. Do not use Dig inside the cave; Dig does not work on dungeon floors in the Generation III games.
What to do right after you leave the cave
The Cinnabar Island side of Seafoam Islands is the gateway to three late-game areas: the Pokémon Mansion, the Cinnabar Gym, and the Berry Forest on the optional side trip back to the Sevii Islands. The natural next step is the Pokémon Mansion, because Blaine’s Cinnabar Gym is keyed around Fire-type specialist matchups that you can prepare for with items and TM scouting from the Mansion’s basement.
Before you walk into the Mansion, take a moment to heal at the Cinnabar Pokémon Center and restock the items you used in Seafoam. The Mansion has a few scripted battles that reward a small amount of XP, plus the Cinnabar Volcano inside the basement that opens after the Gym. If you caught Articuno in Seafoam, the Cinnabar Gym’s Fire-type specialists will be weaker, because Articuno resists most of their STAB moves and outspeeds them.
For players who want to take a break from the main path, Seafoam Islands also opens up the post-game when you return with the National Pokédex. In the post-game, the legendary birds can be found at the Seafoam entrance and at the Power Plant, and the cavern’s deeper floors spawn a wider encounter pool that includes Pokémon from the Hoenn and Johto regions. None of this is required for the main FireRed campaign, but it gives the cave a second life as a high-level training area.
Frequently asked questions
Do I need Flash in Seafoam Islands Fire Red?
Yes, in practice. The Generation III games keep the original cave darkness behavior, so without Flash you can only see a small circle of tiles around your trainer. The boulder puzzles still work without Flash, but the chance of pushing a boulder in the wrong direction goes up sharply. Use Flash at the entrance of every floor to keep the routing readable.
Can I skip the boulder puzzles with a Pokémon that knows Dig?
No. Dig returns you to the last entrance you used, and it does not interact with the holes in the cave floors. The only way to reach B4F is to push the boulders into the holes so the ladders become usable. There is no field move or item that skips the puzzles.
Should I use the Master Ball on Articuno?
Yes, unless you are specifically attempting a no-Master-Ball challenge run. Articuno’s catch rate is one of the lowest in the natural play through, and the only other legendary available in the same campaign is Mewtwo on Cerulean Cave. The Master Ball guarantees the catch and lets you save your Ultra Balls for the more common legendaries in the post-game.
What level should my party be for the Articuno fight?
A party in the high 30s will handle Articuno comfortably. A party in the low 30s can win, but you should lean on status and healing because Articuno’s Ice Beam can pick off a frail lead in two hits. If your team is below level 30, spend a few minutes training in the Seafoam lower floors first; Tentacool and Seel are good XP for this level range.
Does LeafGreen have a different layout from FireRed in Seafoam?
No. The dungeon layout, item placement, encounter pool, and boulder puzzle order are identical between FireRed and LeafGreen. The only differences between the two versions are the version-exclusive Pokémon you can catch on the routes outside the cave.
Can I leave the cave and come back without losing progress?
Yes. Seafoam Islands is a regular cave, so leaving and re-entering does not reset the boulder positions. The puzzle stays solved for the rest of the playthrough. If you accidentally push a boulder into a wrong hole, save the game inside the cave before reloading, because a reload will put the boulder back at its starting position only if you saved before the push.
Are there any rare Pokémon in the deeper floors?
Shellder and Krabby appear on the lower floors, and they are both useful for players who skipped the Rock Tunnel encounter pool. Tentacool is the most common encounter on B3F and B4F, and it can be a good pickup for a special wall on the Cinnabar Gym team. There are no exclusive legendary encounters beyond Articuno in the natural FireRed play through.
What is the best reward for clearing Seafoam Islands Fire Red besides Articuno?
The Nugget hidden on B4F is the most valuable single pickup in the dungeon, especially early in the game when you need the cash for the Celadon Department Store purchases. Beyond the Nugget, the cave gives you access to Cinnabar Island, the Pokémon Mansion, and the Cinnabar Gym, which is the most useful long-term reward because the Gym unlocks the next badge.
Can I reach Cinnabar Island without going through Seafoam Islands?
In FireRed and LeafGreen, no. The Generation III remakes keep the original Red and Blue geography, which means Cinnabar Island is land-locked from the west. The only way to reach Cinnabar by land is to walk through Seafoam from Route 20, and the only way to reach Cinnabar by sea is to use a Pokémon that knows Surf and to enter from the south side of the island, which still requires the Seafoam passage to access the gym on the main island.
Does Articuno respawn if I defeat it?
No, not in the natural FireRed play through. The single Articuno encounter in the Seafoam B4F chamber is one of the few legendary encounters in the game that does not respawn after a knock-out. If you want a second Articuno, you have to restart the game or trade with another player who caught one. This is one of the reasons the Master Ball is the safest pick for the encounter.