Resident Evil Village walkthrough: a complete main story path
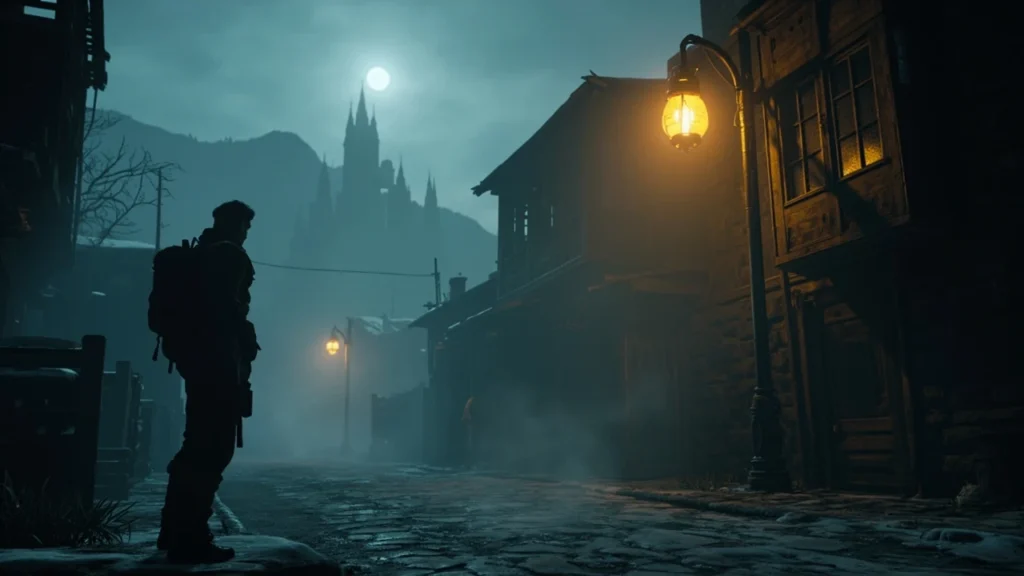
Resident Evil Village walkthrough: a complete main story path
Resident Evil Village is built around ten chapters that move Ethan Winters through a snowbound Romanian village, a gothic castle, an underground reservoir, a dollhouse, a factory, and finally a mineshaft. A practical Resident Evil Village walkthrough groups those areas by location rather than by chapter number, because the game reuses the central hub between excursions and rewards players who spend optional time in the village, castle courtyard, and House Beneviento for crafting materials, treasure, and extra Lei.
This guide covers the main path, the key bosses, the puzzles that tend to stall first-time players, and the inventory decisions that decide whether a second playthrough is comfortable. It assumes the default Standard difficulty. On Hardcore, damage is roughly doubled and autosaves are sparser, so the same path needs more conservative ammo spending and more frequent use of crafting. Village of Shadows is the unlockable third difficulty and only becomes available after finishing the main game once, so the main path below does not change for it, but item density is lower and enemy aggression is higher.
How progression actually works
The game does not give Ethan a quest log in the modern sense. Each chapter is short, usually twenty to forty minutes, and the only navigation aid is a map of the current area with locked doors marked. Progress is linear between story events, but each location has a generous amount of optional content: locked doors that need a special key, breakable crates, and hidden drawers. Knowing the difference between a soft lock and a hard lock matters. A soft lock opens the moment you find the right key in the same chapter. A hard lock stays shut until you return later with an upgrade from a different area, and those are the doors worth marking on the map with the pause menu.
Lei, the currency, is dropped by defeated enemies, found in jars, and earned by selling combined items. Herbs grow in planters, especially around Castle Dimitrescu, and crafting uses the simple recipe of one herb and one fluid. Chem fluid is the common ingredient and is found in toilets, sinks, and storage rooms throughout the game. Gunpowder is mined from walls with a knife and combined to make ammo. The crafting system is the single most important survival mechanic in the game, because the game rarely gives Ethan more than a magazine or two of pistol ammo after a fight unless the player has been disassembling gunpowder and storing it. If the inventory flashes yellow while you are still in a room, you have already over-collected and need to combine before picking up the next item.
Save points appear at the Duke’s shop, at typewriter desks in fixed locations, and in a small number of safe rooms. The Duke is the merchant who appears in every major area after the first village, and his shop rotates based on what you have already found. The first visit is always lean, and later visits include weapon upgrades, healing recipes, and the magnum. A useful habit is to open the shop menu on every visit even when you have nothing to sell, because the Duke occasionally has a single rare item that disappears from the rotation once it is bought.
Before you start: setup and loadout decisions
Two early decisions shape the run. The first is whether to spend Lei on the Duke’s shop the first time you meet him, or save Lei for a better weapon later. The second is whether to backtrack to previous areas immediately after unlocking a new key, or to keep pushing forward and return only when a door is genuinely required. The correct answer for a first run is to keep pushing forward and return only when a door blocks you. The reason is simple: backtracking in the early chapters is a long walk through a hostile map with no guaranteed healing, and the rewards tend to be small Lei caches that do not change the mid-game economy.
- Open every drawer and cabinet you can, but leave locked drawers until you actually need the key. Many doors open the same way a previous one did, and the keys for them often sit in the same room as the door.
- Keep at least one healing item in the manual slot so the pause menu can be used as a panic button during scripted chases, where opening the inventory is faster than aiming.
- Carry a single knife charge as a backup. A knife blocks a single hit from most basic enemies and frees the rest of the inventory for ammo and herbs, and a repaired knife keeps that property through the rest of the run.
- Mark the merchant’s crafting recipes mentally. The same recipe appears in the Duke’s inventory after the player has gathered enough of one ingredient, and the cost is fixed across visits.
- Do not sell treasures until the Duke’s shop confirms a higher tier. Some treasures belong to a set, and the second piece of a set sells for more than the first.
Chapter-by-chapter path
Chapter 1: The village
The first chapter is a slow tutorial. Ethan walks to his car, has his first scripted encounter, and learns to aim, shoot, and break objects. Three handgun magazines are enough to clear the first group of lycans near the gate. The craft recipe for pistol ammo appears on the Duke’s menu early, and the player should make sure to have at least one piece of gunpowder before continuing. The lycans in the first chapter are slower than the lycans in the second village visit, and headshots stagger them long enough to chain two follow-up shots before they recover.
The gate to the west does not open until later, so the path forward is through the main street to the graveyard. The graveyard’s western mausoleum is the first locked-door payoff of the game and contains the first treasure, a crystal fragment, sold for Lei. The chapel is the first boss arena, and the fight against the first major enemy rewards distance and aim rather than close-range fire. The encounter is short, and the game does not gate the rest of the chapter behind the result, so a low-ammo first run can still clear the chapel with a single mag and two dodges.
Chapter 2: Castle Dimitrescu
The castle has three main floors, an extensive wine cellar, and a separate courtyard. Three daughters chase Ethan on a fixed path in the upper floors. Running is the right response to those chases, because the daughters have a fixed script and a fixed spawn point, and stopping to fight them on the stairs only delays the inevitable. Handgun damage is the right response to the daughter’s boss fight, but the player should save shotgun shells for the second-floor corridors. The hall of four masks in the ceremonial hall is the puzzle that stalls most players, and the fix is simple: the order of the four masks is the order of four paintings found on the upper floors, and the four masks each correspond to a daughter.
The Lady Dimitrescu boss fight takes place across three phases. Phase one happens in the throne room and is a chase sequence where Ethan can only sprint and dodge. Phase two happens in the dungeon and rewards shotgun shells to the face while she leans down to attack. Phase three is a long chase up the tower, and the right response is to keep the camera centered and avoid the flying insects. The Duke appears in the castle’s main hall after the boss, and the player should upgrade the handgun and buy extra shotgun shells before continuing. A first-aid med is also worth buying here, because the next chapter has no merchant until the end.
Chapter 3: Reservoir and Moreau
The reservoir area includes a flooded lab and a long drainage tunnel. The puzzle in the lab is a sequence of switches and a glass case, and the answer is to drain the case by pulling the right lever combination. The note next to the case lists the order in Romanian, and the matching order is the same one used in the castle’s mask puzzle: top to bottom, left to right. The Moreau boss is a long fight in a flooded arena, and the right response is to keep distance and shoot the orange sacs that appear on the creature’s body. A single shotgun is enough; the player should not waste rocket launcher ammo here. The arena has three raised platforms that act as safe zones, and a patient run that hides behind the platforms between shots will clear the fight with the starting sniper and a few shotgun shells.
Chapter 4: House Beneviento
House Beneviento is a short, slow, atmospheric chapter with no combat until the very end. The cat-and-mouse sequence in the dollhouse is the famous puzzle, and the right approach is to keep a light source active and to use a single key item at a time. The dollhouse itself is three rooms deep, and the items inside are duplicates of objects in the main house, so a player who has already explored the upper floor will recognize them. The boss at the end is a horror set piece rather than a combat encounter, and the game tells the player exactly what to do through a controller prompt. The reward is the sniper rifle, and the chapter ends with a long cutscene that explains the next location.
Chapter 5 and 6: The factory
The factory area is the most action-heavy section of the game. Heavy weapons appear here, and the puzzle at the end of chapter five is a fuse and generator combination. The fuse is in a locker on the second floor, the generator is in the loading bay, and the correct order is to slot the fuse first and then pull the lever. The boss is a series of strider enemies, and the right response is to use the heavy weapon on the armored striders and the sniper rifle on the unarmored striders. The factory also has a large amount of breakable crates, and the player should use the knife to break them all to maximize Lei and ammo returns. A careful knife run through the upper catwalks in chapter 6 will return several thousand Lei and a full stack of gunpowder before the next boss.
Chapter 7 to 9: Return to the village
The village returns as a hub, and the player has access to four large areas that were previously locked. The right approach is to clear them in the order they appear on the map, because each area has a fixed number of enemies and a fixed amount of treasure. The five bells puzzle is solved by shooting the five bells with the sniper rifle, and the right order is the one shown in the village map. The luiza house has a hidden room behind a bookshelf, and the house with the broken balcony has a second treasure in the chimney. The stronghold is the longest of the four areas and has its own merchant with a unique weapon upgrade that is worth saving Lei for.
Chapter 10: Chris Redfield, the mineshaft, and Mother Miranda
The final chapters are short, scripted, and the player should save all heavy weapon ammo for the final boss. Mother Miranda has several phases, and the player should use the sniper rifle for the long-distance phases and the shotgun for the close-range phases. The final choice at the end of the game is a short cutscene and does not change the main story outcome, but it does change the ending and the unlock condition for the New Game+ mode. A first run that has the magnum upgraded once and at least six heavy rounds left will clear the final fight without using a single healing item, and a first run that does not will need at least two first-aid meds and a herbal mixture in the second phase.
Main path checklist
The table below summarizes the recommended main path with the right loadout at each transition. Use it as a sanity check before each new area.
| Chapter | Area | Required key items | Recommended loadout | Lei to carry |
|---|---|---|---|---|
| 1 | Village outskirts | None | LEMI handgun, 3 magazines | At least 2,000 |
| 2 | Castle Dimitrescu | Mask pieces, iron-insignia key | W870 shotgun, LEMI, knife | At least 8,000 |
| 3 | Reservoir and Moreau | Laboratory pass, fuse | M1851 Wolfsbane magnum, W870 | At least 10,000 |
| 4 | House Beneviento | Dollhouse key, music box | Handgun only, sniper acquired late | At least 5,000 |
| 5 | Factory entrance | Factory keycard, fuel | GM79 grenade launcher, sniper | At least 12,000 |
| 6 | Factory upper floors | Power panel part | All weapons, light ammo | At least 15,000 |
| 7 | Village revisit, west | Six-bladed knife, crests | Sniper, grenade launcher | At least 20,000 |
| 8 | Village revisit, east | Sluice gate key | Full inventory, magnum | At least 25,000 |
| 9 | Stronghold | Golden Lady Statue, sword | Full inventory | At least 30,000 |
| 10 | Mineshaft, final boss | Crystal torso | Full inventory, magnum, all heavy ammo | At least 40,000 |
Boss strategy summary
For additional context, Boss fights in Resident Evil Village reward preparation over reflexes. The table below gives a short summary; the rest of the section expands on each fight in the order it appears on the path.
| Boss | Where it appears | Best weapon | Best approach | Ammo to save |
|---|---|---|---|---|
| First major village enemy | Graveyard chapel | Handgun | Distance, aim for head | None |
| Three daughters | Castle upper floors | Handgun, then shotgun | Match color, attack weakness | Shotgun shells, 8 |
| Lady Dimitrescu | Castle dungeon, tower | Shotgun, then magnum | Close range, dodge, repeat | Magnum rounds, 4 |
| Moreau | Flooded lab | Shotgun, sniper | Distance, shoot orange sacs | Heavy ammo, 2 |
| House Beneviento horror | Beneviento basement | None | Follow on-screen prompt | None |
| Strider pair | Factory loading bay | Grenade launcher, sniper | Kill armored one first | Heavy rounds, 3 |
| Sturm | Factory furnace | Magnum, sniper | Aim for head, distance | Magnum rounds, 4 |
| Mother Miranda phase 1 | Village altar | Sniper | Dodge black feathers | Heavy rounds, 2 |
| Mother Miranda phase 2 | Village altar | Magnum, shotgun | Close range, interrupt attacks | Heavy rounds, 4 |
| Mother Miranda phase 3 | Village altar | Magnum, sniper, all heavy | Distance, shoot glowing weak points | Everything left |
Puzzle reference
Puzzles in Resident Evil Village fall into a small number of patterns. Knowing the pattern turns a stuck room into a five-minute task and removes most of the backtracking that first-time players complain about.
- Mask order: the four paintings in Castle Dimitrescu show the order in which the four masks are placed on the ceremonial hall statues, and the same left-to-right, top-to-bottom rule applies in the reservoir lab.
- Bell sequence: the village map shows the five bell towers in the order they need to be shot. The sniper rifle hits the bells reliably even in fog, and the correct order is the one written on the map marker.
- Sluice gate combination: the gate code is written on a note in the village well. The note is in Romanian and English, and the English version is a four-digit number that matches the lock on the east sluice.
- Five-statue puzzle: the five statues in the stronghold need to be pushed in the order their shadows fall on the floor, and the room is lit by a single window that moves the shadows as the player turns the statues.
- Music box: the music box in House Beneviento uses a single item at a time. Rotate items in the inventory until the right one fits, and the wrong item makes a short, sharp sound that is easy to identify.
- Power panel: the factory’s power panel is a standard breaker puzzle where each switch toggles two others, and the solution is to start from the bottom-right corner and work upward.
Inventory and crafting rules that hold throughout the game
The same five rules apply from the first chapter to the last. Treat them as a checklist rather than a strategy, and the run becomes a slow, deliberate game instead of a panic. The rules are not new-player tips; they are the same rules a speedrun uses, just with more patience between rooms.
- Keep the inventory at 70 percent capacity or less. A full inventory is a missed item, because the player cannot pick up the next thing they see, and the autosave will not trigger until the inventory closes.
- Combine gunpowder every time the inventory hits the cap. Storing gunpowder does nothing, and a single recipe can be combined, separated, and re-combined at a workbench, so there is no reason to leave it raw.
- Sell every treasure except the crystal fragments, the crown, and the chalice. Treasures are sold to the Duke in fixed stacks and pay better than combined items, and the three exceptions are needed for a late-game door and a trophy.
- Use herbs in the field only when the pause menu cannot be used. Field herbs waste a slot, and the pause menu restores health without one, so the inventory stays cleaner for ammo and keys.
- Save the magnum for the Lady Dimitrescu and Mother Miranda fights. The magnum is the only weapon that does reliable damage in the long boss arenas, and the game gives the player exactly enough magnum rounds to win both if none are wasted on regular enemies.
Optional content that pays for itself
Optional content is not extra credit. Most of it returns more Lei than the player spent to reach it, and the upgrades that are gated behind a small Lei or a small number of upgrade parts are the upgrades that matter most in the late game. Treat the following list as a checklist after each chapter, and the run will end with a full upgrade path and a stockpile of magnum rounds rather than a panic at the final boss.
- Castle Dimitrescu: the upper gallery has a hidden door that opens with the iron-insignia key and contains a treasure worth 10,000 Lei, and the same key opens a side room with a second shotgun and a full stack of shells.
- Reservoir: the lab’s eastern annex has a large amount of gunpowder on the walls. A single knife run clears the annex of all of it, and the same annex has a lockbox that opens with the lab pass.
- House Beneviento: the well behind the house has a locked box and a large amount of crafting fluid. The box opens with the four-wardrobe key, which is found in the upper floor, and the fluid is enough for three full healing mixtures.
- Factory: the furnace room has a second Duke’s shop and a unique weapon upgrade. The upgrade is the most expensive in the game and is worth saving Lei for, because it reduces the magnum’s recoil and adds a small damage bonus.
- Village revisit: the houses in the village have several locked doors that open with crest keys. Each one has a small amount of treasure and a small amount of crafting fluid, and the keys are sold by the Duke once the relevant chapter is reached.
What changes on Hardcore
Hardcore is the right second-playthrough difficulty. The game does not change the path, but it changes the way the player uses the path. Healing is slower, autosaves are sparser, and the magnum is more expensive at the Duke’s shop. The right adjustment is to spend Lei on a larger healing inventory and on a single magnum, rather than on weapon upgrades. Weapon upgrades are cheaper in terms of Lei and are more effective on Hardcore because the enemy health bar is unchanged. The same path that takes ten hours on Standard takes about thirteen on Hardcore, because the player spends more time looting drawers and fewer time running past rooms that have already been cleared.
Village of Shadows is the third difficulty and the one that most players skip on the second run. The damage multiplier is higher than Hardcore, item density is roughly halved, and the Duke’s shop rotates more slowly. A first run on Village of Shadows is a learning experience, not a completionist run, and the recommended path is the same one used for Hardcore, with the addition of a magnum-only run for the final boss. The same trophies still unlock, but the secret ending is harder to reach because the crystal fragments are in the same locations and the player has fewer healing items to clear the rooms around them.
New Game+ and unlockables
Finishing the main path unlocks the following. None of them are required to complete the game, but each one is a good reason to play the path again with a different loadout and a different Lei economy.
- Village of Shadows: the third difficulty, with reduced item density and higher damage, and the same path as Standard and Hardcore.
- New Game+: carries over weapons, upgrades, Lei, and treasure, but enemies are tougher and the magnum is more expensive at the Duke’s shop.
- The merchant’s challenge: a fixed series of purchases at the Duke’s shop that unlocks a unique weapon, and the challenge is completed in a single run if the player buys the right items in the right order.
- Concept art: opened by collecting the crystal fragments in the main path. There are twenty in total, and the gallery is sorted by chapter.
- Soundtrack: opened by collecting the cassette tapes. There are twelve in total, and the soundtrack menu includes the option to play the game’s main theme on loop.
How this guide connects to the rest of the site
For another full-length survival run that uses a similar pattern of crafting, looting, and boss preparation, the Fallout 4 walkthrough covers the same loop in an open-world setting. For readers who want a short verification of the setting and the chapter structure used in this guide, the Resident Evil Village article on Wikipedia is the most useful public summary, and the Game Informer environment tour from April 2021 shows the castle, village, and factory areas as the developers framed them before launch.
Final pre-final-boss checklist
Before walking into the final chapter, the player should have the following. If any of these are missing, the run is recoverable but harder, and a single bad phase transition can burn through the rest of the inventory.
| Item | Minimum amount | Why it matters |
|---|---|---|
| Handgun ammo | 40 rounds | Backup for the long phase transitions |
| Shotgun shells | 30 shells | Close-range damage in phase 2 and 3 |
| Sniper rifle ammo | 20 rounds | Distance damage and the first Mother Miranda phase |
| Magnum rounds | 8 rounds | Single-target damage across all three phases |
| Heavy weapon rounds | 6 rounds | Stagger damage on the largest form |
| Healing items | 6 first-aid med, 2 herbal mixtures | Phase transitions, scripted chases |
| Lei | 20,000 | Final upgrades at the Duke’s shop |
| Crystal fragments | 20 of 20 | Required for the secret ending |
The path is the same path on every difficulty and on every mode. What changes is the inventory the player brings to it, the way the player spends Lei, and the order in which the player opens the optional doors. Treat the path as a route, treat the inventory as a budget, and treat the bosses as the only fights that actually require the magnum. The rest of the run is a slow walk through a foggy village, a quiet castle, and a few short puzzles that the game does not hide very well. A first run that follows the checklist and ignores the optional content will finish in about ten hours; a first run that takes the optional content will finish in about fifteen and will start the second run with a full upgrade path and a stockpile of magnum rounds.
Frequently asked questions
How long is Resident Evil Village on the first run?
The main path takes about ten to twelve hours. Optional content adds another three to five hours. The full completionist run, including all crystal fragments, all cassette tapes, and all weapon upgrades, is closer to twenty hours, and the DLC adds another four to six hours on top of that.
Is Resident Evil Village connected to Resident Evil 7?
It is a direct sequel. The first chapter opens with Ethan Winters and his wife Mia in the same house from Resident Evil 7, and the second half of the game features Chris Redfield. The two games share the same protagonist, the same inventory pattern, and a small amount of returning lore about the mold and the Bakers.
What is the best weapon in the game?
The magnum is the strongest single weapon for boss fights, and the grenade launcher is the strongest area weapon for groups. The sniper rifle is the strongest mid-range weapon for armored targets. The right combination is magnum, sniper, shotgun, and grenade launcher, with the handgun as a backup for the long stretches between shops.
Should I spend Lei on weapon upgrades or healing items?
Spend Lei on weapon upgrades first. Healing items are found in the field and through crafting, and the inventory cap makes hoarding them wasteful. Weapon upgrades are permanent and reduce the number of shots required to clear each room, and the same upgrade carries over to New Game+ once the mode is unlocked.
Can I miss the secret ending?
Yes. The secret ending requires collecting all twenty crystal fragments and selecting the right option at the end of the final chapter. The fragments are in fixed locations, and the guide above lists the chapters where the largest clusters appear. Missing a single fragment locks the secret ending until the next run, even if the rest of the path is intact.
Does the game have a New Game+ mode?
Yes, and it unlocks after finishing the main path once. It carries over weapons, upgrades, Lei, and treasure, and it raises the difficulty of the enemies. The new difficulty is called Village of Shadows and is unlocked at the same time as New Game+, and the two modes can be combined or used separately.
What is the best difficulty for a second playthrough?
Hardcore is the right second difficulty. It doubles enemy damage, reduces item density, and removes the auto-heal effect from the pause menu. Village of Shadows is harder, but it is better as a third run after the player has seen everything the main path has to offer and has a stockpile of magnum rounds from the second run.
Are there missable trophies?
Yes. Several trophies require playing the main path on Hardcore, finishing the game once, or collecting all crystal fragments. None of the trophies are missable within a single playthrough, but several are missable across a single save and require a second run to pick up, and the secret ending trophy is the one most players miss on a first run.
Does Resident Evil Village have DLC?
Yes, the Winters’ Expansion DLC adds a short story chapter, a new third-person mode for the main game, and a mercenary-style survival mode. The DLC is included in the Gold Edition and in the next-generation upgrade and is sold separately on older platforms, and the third-person mode is a separate toggle in the main menu.
Is the game playable on Steam Deck or handheld PCs?
Yes. The PC version runs on the same engine as Resident Evil 7, scales well to a 60 fps target, and supports a cloud-save system that lets a player move progress between devices. The console versions do not have a native handheld mode on PlayStation 5 or Xbox Series X, but both run at a stable frame rate on their respective platforms, and the PS5 version supports the DualSense haptics for the scripted chases.