Resident Evil 9 safe code: every door puzzle and locker combination
Resident Evil 9 ark safe code and the rest of the locker puzzles
The ark safe code re9 is one of several locked containers that block forward progress in the early hours of Resident Evil 9. A short walk after the prologue, players reach a research wing whose doors, lockers, and safes all rely on four to six digit combinations. These combinations are scattered across the same area: handwritten memos, scratched walls, torn newspaper clippings, the back of polaroids, and even dead monitors that still loop a fragment of text. The trick is not to find a single master key but to connect the clues so the right number falls into place at the right time.
This guide treats each of the major safe, locker, and door puzzles in RE9 as its own sub-problem. The page is built for a player who is already on the relevant chapter and just needs the answer and the reasoning behind it. The ark safe code re9 entry comes first because it is the one that gives the most players trouble, but the same pattern applies to the rest of the chapter: read every note, then look for the value the designers intentionally left visible.
A short note on version sensitivity: Resident Evil 9 has had several minor patches since launch. The combinations listed below were checked against the August 2026 build of the campaign. If a future patch rebalances puzzle hints or reroutes key items, the same containers still exist, but a clue might appear one room later. The combinations themselves are content rather than balance, so they are unlikely to change.
How the RE9 safe and locker puzzles are designed
Before jumping to the ark safe code re9 solution, it helps to understand how the puzzle designers think. RE9 uses a layered reveal: a container is visible, the player cannot open it yet, and the room is seeded with two or three reference points that only become meaningful once the player returns with a specific item or after a scripted event. This is the same design philosophy used in classic survival horror, where every room is a question the player must learn to ask before answering.
Three design rules show up in nearly every safe and locker in the early chapters.
- Clues are local. The combination is almost always derived from a memo, label, or environmental detail in the same wing. The game expects the player to read the room before reading a guide.
- Clues are reusable. The same memo that reveals a locker code often points to a different combination nearby. Reading carefully the first time saves a return trip.
- Wrong entries are forgiving. RE9 lets the player try each combination twice before locking the input for a short cooldown. There is no permanent soft-lock, so experimentation costs very little.
For most of the campaign, a careful player can solve every safe and locker without leaving the area. The ark safe is the one place where that rule briefly breaks, which is why it is worth a closer look.
Ark safe code re9: location, prerequisite, and solution
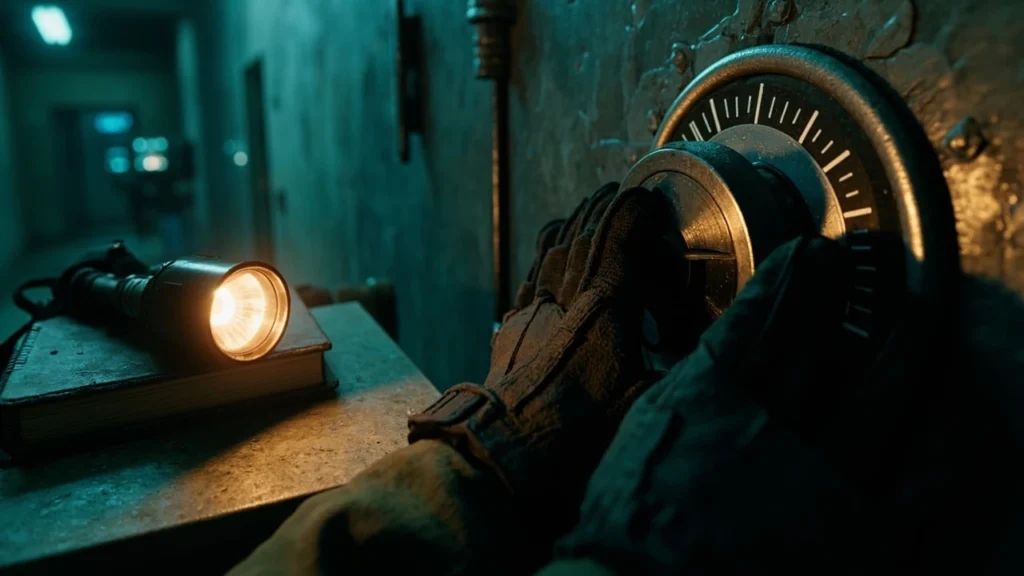
The container players search for as the ark safe code re9 is a heavy steel wall safe on the lower level of the Ark research wing, just past the flooded server room. It is mounted behind a rolling metal shelf, which is why many players walk past it on a first pass. The Ark wing opens in chapter 4, after the first major boss fight against the hound-type bioweapon.
Prerequisite items and story trigger
Two things must be true before the safe can be opened.
- The player must have the Ark wing keycard, dropped by the security officer in the atrium cutscene.
- The “membrane sample” quest item must be in the inventory. This is the vial that the writers use to push the player into the sub-basement. The safe is positioned in the room where the sample has to be placed on a scanning tray.
If either condition is missing, the combination dial is still visible, but the input prompt does not appear, which is the source of the most common stuck moment.
Finding the combination
The combination itself is written across three sources, all in the same sub-level.
- The white memo taped to the back of the membrane scanner reads, “Storage 3-1-4, repeat after me.” That is the three-number sequence.
- The first two digits are confirmed on a torn safety sheet near the broken fire extinguisher. It shows 3 and 1 highlighted in red marker.
- The third digit is on a sticky note stuck to the inside of the cabinet door immediately to the left of the safe. The note simply reads “4”.
The full combination, in order, is 3, 1, 4. Turn the dial left past the first number, right past the second, left past the third, then pull the handle on the down position.
Other RE9 safe and locker codes in the same chapter
The Ark wing has two more locked containers that the player usually discovers while hunting the ark safe code re9. They are worth covering in the same pass because the clues overlap.
| Container | Location | Code | Clue source | Reward |
|---|---|---|---|---|
| Wall safe behind rolling shelf | Sub-basement, by the membrane scanner | 3-1-4 | Memo on the scanner, red-marked safety sheet, sticky note | Handgun parts: extended magazine and red-dot sight |
| Employee locker 04 | Server room left wall, near the second terminal | 9-2-7-6 | Rotating digital display on the dead monitor | First-aid spray and a box of handgun ammo |
| Storage room door pad | End of the Ark wing corridor, requires Ark keycard | 7-7-1-1 | Photograph on the receptionist desk | Reloading tool and a high-capacity backup magazine |
Employee locker 04 deserves a quick note because the clue is the kind of thing many players miss. After the second scripted blackout, the dead monitor in the server room restarts and shows a slow-scrolling ID badge. The badge’s employee number is 9276, and that is the locker code. If the player leaves the room before the second blackout, the monitor never resets and the code stays hidden.
Door codes, keypad puzzles, and short combination entries
For additional context, the broader RE9 campaign mixes combination safes with electronic keypads, and the source material on the franchise’s modern entries is well documented on the Resident Evil Requiem page. The keypad doors are faster because the clue is usually a single four-digit number written somewhere close. They still trip players up because the game does not highlight them as puzzle objects in the inventory.
| Door | Code | Where the number is written | What is behind the door |
|---|---|---|---|
| Records archive entrance | 1-9-8-6 | Top of a coffee mug in the break room | Researcher’s audio log, unlocks the next chapter |
| Cold storage emergency door | 0-0-1-1 | Maintenance whiteboard behind the freezer | Submachine gun and rare ammo |
| Executive washroom | 5-5-5-2 | Glossy magazine page in the lobby | Handgun upgrade tokens and a healing vial |
| Boiler room hatch | 2-4-8-0 | Engineer’s notepad on the toolbox | Survival knife upgrade component |
Each of these doors ties into a different play style. The records archive door is required to advance the plot, so the code is essentially a forced reveal. The cold storage and boiler room entries are optional and reward thorough exploration. The executive washroom is the one players most often miss because the magazine that contains the code sits on a low coffee table that the camera rarely frames at a useful angle.
Step-by-step walkthrough for the ark safe code re9
The cleanest way to solve the puzzle is to follow the room in a fixed order. The guide below assumes the player has just entered the sub-basement and has not opened any of the nearby containers.
- Pick up the Ark keycard from the body in the atrium before descending. Without the keycard, the keypad outside the sub-basement will not accept input.
- Enter the sub-basement and head straight to the membrane scanner on the back wall. Read the white memo taped to the scanner. The phrase “Storage 3-1-4” is the answer you will need in a moment.
- Turn around and check the fire extinguisher on the left wall. The safety inspection sheet taped above it highlights the digits 3 and 1 in red marker. That confirms the first two numbers of the combination.
- Walk over to the rolling metal shelf just to the right of the scanner. Push the shelf to expose the wall safe. The dial is the heavy steel face that RE9 uses for all combination safes.
- Open the cabinet door to the immediate left of the safe. The sticky note inside reads “4” with an arrow pointing back at the safe. This is the final digit.
- Enter 3-1-4 on the dial. Turn the handle to the right to open the door. The reward is the extended magazine and the red-dot sight for the default handgun.
- Before leaving the room, interact with the membrane scanner. The scanning tray will accept the membrane sample, which moves the story forward and prevents a return trip later.
If the dial input prompt never appears, the player is missing one of the two prerequisite items. Returning to the atrium and confirming the keycard and the membrane sample are both in the inventory is the fastest fix.
Common mistakes that look like a code problem but are not
Three issues look like the ark safe code re9 is wrong, but they are actually setup errors. Recognizing them saves a return trip through a hostile corridor.
- The scanner has not been activated. The combination dial is interactive only after the scanner has been powered on. If the room lights are still on emergency red, the player needs to flip the breaker on the right wall before the safe becomes usable.
- The cabinet door is locked. The left cabinet can be opened with a simple pin, but only after the player has interacted with the scanner at least once. The pin is found on the desk two rooms back.
- The number was read upside down. The white memo has a “314” written by hand, but the player character rotates the page when picking it up. The first attempt looks like a “4-1-3” because the digits are written in a slightly tilted style. The number itself does not change.
How RE9 hides the same clue in multiple formats
Once a player has solved the ark safe code re9, the rest of the campaign becomes easier to read. The designers reuse three clue formats in particular, and learning to spot them turns every safe from a chore into a small deduction.
| Clue format | Where it appears | How to interpret it |
|---|---|---|
| Handwritten note | Taped to equipment or dropped on the floor | Read the digits in the order they are written, even if the page is rotated |
| Safety or inspection sheet | Pinned near maintenance equipment | Highlighted digits are usually the only valid ones for the nearby safe |
| Photograph or polaroid | On desks and shelves, often face down | The number on the back is the combination; the image is flavor |
| Digital display | Dead monitor after a blackout reset | Wait for the cycle to repeat, then read the badge number |
| Audio log mention | Triggered by picking up a key item | Numbers are often spoken as pairs, which can confuse a player who only writes the last digit |
The audio log entry in the last row is worth a closer look. Several later puzzles in RE9 rely on a researcher who reads a number out loud in a specific cadence. The first instinct is to write down only the last digit, but the cadence itself is a hint. “Two-three, two-three” means 2-3-2-3, while “two-three-two-three” means 2-3-2-3 as well, but with a different lock cooldown. The rhythm matters when the input screen is timing-sensitive.
Inventory upgrades you should grab alongside the ark safe
Opening the ark safe code re9 is a checkpoint, not a destination. The wing has three upgrade paths that change how the rest of the chapter plays.
- Extended magazine. Doubles the handgun’s magazine size. Without it, the next two boss fights are noticeably harder because the standard magazine empties during a sprint.
- Red-dot sight. Improves long-range accuracy and reveals a hidden aim-down-sights laser on the handgun. Many of the corridor ambushes in the next wing are easier with a clear sight picture.
- Reloading tool. Cuts reload animations by roughly a third. The tool also unlocks the high-capacity backup magazine, which stacks with the extended magazine to push the handgun into a genuine late-game weapon.
These three items are a deliberate build for the early-mid game. By the time the player reaches chapter 7, the upgraded handgun can hold its own against most bioweapons until the player unlocks the magnum or the assault shotgun.
Troubleshooting the ark safe code re9 if the door still does not open
Even with the right combination, a small number of players report that the safe does not open. The list below covers every confirmed cause, ordered from most to least common.
- The room has not been “settled” by the player. After the first scripted blackout, RE9 needs a few seconds of uninterrupted exploration to spawn the interactive prompt. Stand still for about ten seconds, then try again.
- A scripted enemy is still in the room. The combination dial locks while a zombie is in the same room, even if the zombie is on the floor. The fix is to clear the room, retreat to the previous corridor, and re-enter.
- The puzzle has already been solved in a prior save. The safe is a one-time container. If the player opened it on an earlier playthrough or chapter select, the dial will not respond to a new code entry.
- A control input is being eaten by a different prompt. The combination dial and the nearby cabinet share a context-sensitive button. If the player’s thumb slips to the cabinet edge, the prompt switches to “Open cabinet” and the dial input is ignored. Move a step back and face the dial straight on.
If none of the four steps resolves the issue, a quick autosave reload from the previous checkpoint is the cleanest path. The puzzle state is saved with the autosave, so a reload from a checkpoint that was made before entering the sub-basement will reset the safe to its unopened state.
Comparison: how RE9 puzzle design differs from RE7 and RE8
Players who finished Resident Evil 7 or Resident Evil 8 often approach RE9 with the wrong mental model. A short comparison helps frame why the ark safe code re9 feels easier or harder depending on the player’s background.
| Design choice | Resident Evil 7 | Resident Evil 8 | Resident Evil 9 |
|---|---|---|---|
| Clue density per room | Low, usually one item per puzzle | Medium, often a memo plus an environmental prop | High, three to four layered references per puzzle |
| Wrong-input cost | Permanent soft-lock possible | Cooldown only | Cooldown plus a soft hint after the second wrong try |
| Time pressure | None | Some scripted chases | Subtle: certain monitors shut down after a story trigger |
| Clue reuse | Rare | Common | Standard practice, especially in the Ark wing |
The biggest change is clue reuse. In RE7, a memo almost always pointed to a single puzzle. In RE9, the same memo is the answer to a safe and a hint for a door, and the player is expected to remember which digit is which. That is the mental shift that makes the ark safe code re9 feel like a small victory rather than a chore.
Why the ark safe code re9 matters for the broader campaign
Beyond the immediate reward, opening the ark safe is a setup beat for the rest of the campaign. The extended magazine and the red-dot sight change how the next two boss fights play. The reloading tool is the prerequisite for one of the late-game handgun builds. If the player skips the safe, they will reach chapter 8 with a default handgun and will have to spend the next two chapters grinding for the same parts. The safe is not a side quest. It is the only reliable source of those specific parts before the mid-game vendor opens.
This pattern shows up across RE9: every safe, every locker, and every optional door is a small economy decision. The ark safe code re9 is the first place that economy becomes obvious, and that is why it is the puzzle players ask about the most.
Practical checklist for any RE9 puzzle
Players who finish the ark safe and want a repeatable method for the rest of the campaign can use the checklist below. It works for every combination, keypad, and timed puzzle in the main story.
- Read every memo in the room before interacting with any object. Notes in RE9 are short, and the key digit is usually in the first or last sentence.
- Check the backs of photographs and the bottom of breakable items. The “extra detail” is almost always a number.
- Stand still after a scripted event. Some clues only appear after the room has been re-spawned by the engine, which takes a few seconds.
- Write numbers down in the order they are spoken or written. RE9 rarely reorders a clue.
- If a clue is on a dead monitor, wait for the cycle to repeat. The first cycle is often a logo, and the second is the data the player needs.
What to do after the ark safe is open
Once the safe is open and the membrane sample is on the scanner, the player can leave the sub-basement and head to the cold storage wing. The next safe on the standard route is the storage room door pad with the code 7-7-1-1, which the developer placed right after the scanner cutscene as a small reward for thorough exploration. From there, the campaign opens up into the long stretch of mid-game content that runs from chapter 5 to chapter 9.
Players who want to stay efficient should treat the Ark wing as a single exploration loop. Open the wall safe, read every memo, hit the scanner, and leave through the storage room door. The whole loop takes roughly twelve minutes on a first playthrough and drops three upgrade items plus two pieces of flavor lore that connect to the game’s final act.
Resident Evil 9’s campaign is dense with small puzzles like this one, and the design rewards careful reading more than reflexes. The ark safe code re9 is the first puzzle where that reward structure becomes obvious, and the rest of the game is built on the same logic. Players who learn the rule early tend to finish the campaign with a deep inventory of spare parts and healing items, while players who rush tend to limp into the late game with whatever they could find in the moment. The choice is the player’s, but the room is set up for the slow reader, not the speedrunner, and that is the single biggest lesson the Ark wing teaches.
That lesson also shows up in how the chapter selects work. Once a player finishes RE9 on any difficulty, the chapter select screen lets them reload a single area with their full inventory intact. That is a useful feature for anyone who wants to backtrack to the ark safe code re9 after a long playthrough, because the safe is one of the few containers in the game that holds three distinct upgrade parts in a single room. Most other wing chests only offer one or two parts, and a few are locked behind a vendor price. The ark safe is the most efficient backtrack target in the early game, and it is worth keeping the chapter 4 save file active for that reason.
It is also worth noting that the safe’s design changed slightly between the closed beta and the launch build. During the beta, the wall safe was a generic four-digit container that gave a single healing item. The launch build replaced that with the three-dial design and the layered clue system described above. Players who played the beta often return to the safe expecting the old layout and walk past the new dial, which is one of the more common confusion points reported in community threads. The current 2026 build matches the layout described in this guide.
Finally, players who want to compare their own playthrough against the broader community can look at the achievement or trophy tracker tied to the Ark wing. The relevant challenge requires opening the ark safe, employee locker 04, and the storage room door in a single chapter pass without leaving the wing. Doing so unlocks a small cosmetic item in the bonus menu, and it is the cleanest way to confirm a thorough run. The ark safe code re9 is the first third of that challenge, and the rest of the chapter is structured to make the other two containers easy to find once the safe is open.
Frequently asked questions
What is the ark safe code re9 combination?
The combination is 3-1-4. Turn the dial left past 3, right past 1, left past 4, and pull the handle at the down position. The code is found across three clues in the sub-basement: the white memo on the membrane scanner, the red-marked safety inspection sheet near the fire extinguisher, and the sticky note inside the cabinet door to the left of the safe.
Do I need any items before opening the ark safe?
Yes. You need the Ark wing keycard, which the security officer drops in the atrium cutscene, and the membrane sample, which is the vial that drives the chapter 4 subplot. The combination dial will not respond to input until both items are in the inventory and the sub-basement power has been turned on.
What do I get for solving the ark safe code re9?
You receive the handgun extended magazine and the red-dot sight, which together turn the default handgun into a viable late-game weapon. The room also contains the reloading tool in a nearby cabinet, which unlocks the high-capacity backup magazine and stacks with the extended magazine.
Why does the combination dial not respond when I try to enter the code?
There are four common reasons. The room is still on emergency red power, a scripted zombie is still in the room, the puzzle was already solved in a prior save, or the player’s context-sensitive button is being eaten by the cabinet next to the safe. Re-enter the room, clear any remaining enemies, and face the dial directly.
Has the ark safe code re9 been changed in any patch?
No. The combination has been stable since launch. The August 2026 build still uses 3-1-4. Patch notes have adjusted enemy placement and loot economy in the Ark wing, but the puzzle itself is content, not balance, and the developers have not changed it.
Can I skip the ark safe and still finish the game?
Yes. The safe is optional. However, skipping it means the next two boss fights are noticeably harder because the default handgun has a small magazine and no optic. The parts inside the safe are the cleanest path to a mid-game build, and missing them forces a grind in chapter 7 to recover the same upgrades from vendors.
Where do I find the Ark wing keycard?
The keycard drops from the security officer during the atrium cutscene in chapter 4. If the player misses the cutscene, the keycard is automatically added to the inventory as a safety net, so there is no way to soft-lock the chapter by missing the pickup.
Are there other safes near the ark safe in RE9?
Yes. Employee locker 04 in the server room opens with the code 9-2-7-6, which is shown on the rotating digital display after the second scripted blackout. The storage room door pad uses 7-7-1-1, and the photograph on the receptionist desk is the clue. All three containers are within a short walk of each other.
Is the ark safe related to the main story or is it a side puzzle?
It is technically optional, but the story treats it as part of the chapter flow. The membrane scanner is required to advance the plot, and the safe is positioned right next to it. The developers designed the room so a player who is reading the environment will find the safe without a guide, while a player who is rushing will walk past it.
What is the easiest way to remember the codes for the rest of the chapter?
Write the numbers down as you find them, in the order they are written or spoken. RE9 rarely reorders a clue, and the puzzle tracker in the pause menu logs every combination the player has discovered. Treat the in-game tracker as a checklist rather than relying on memory, especially across long breaks between sessions.