Legendary mounts in Crimson Desert: how to obtain and use them
Legendary mounts Crimson Desert: how the system actually works
Crimson Desert treats mounts as more than a faster way to cross the map. The game, developed by Pearl Abyss and released after a long pre-production cycle that grew out of the Black Desert Online engine work, lets players bond with a small roster of named animals that each carry their own combat moves, gear, and progression path. Among those animals, the legendary tier sits at the top: rarer spawns, longer tame windows, more demanding upkeep, and abilities that meaningfully change how a fight or a long ride plays out.
This article focuses specifically on legendary mounts in Crimson Desert. It covers what the tier actually changes compared to a standard horse, where players can realistically look for them, what the capture or acquisition flow looks like, and the ongoing costs and choices that come with keeping one alive. The goal is practical: by the end, a player who has not yet tamed a legendary mount should know what to prepare, and a player who already has one should have a clearer picture of how to use it well.
What makes a mount “legendary” in Crimson Desert
The legendary label is not just a flavor word. It gates several concrete mechanics: a higher base stat ceiling, a unique active skill, a restricted breeding outcome, and a capture requirement that goes beyond simply throwing a rope. The system borrows ideas from the long tradition of MMORPG tamable beasts, but Pearl Abyss has layered it with single-player quest beats and a tent-camp recovery loop that feels closer to a survival-action title.
Stat ceiling and scaling
A standard horse in Crimson Desert tops out at the level a player can reasonably reach during the first act. Legendary mounts start at a noticeably higher base and can scale further through bonding actions, gear, and stable upgrades. In practice that means a legendary mount remains useful from mid-game through the post-story content, while a regular horse gradually falls behind enemy density and elite zone design.
Unique active skill
Each legendary mount has a single named ability that triggers on cooldown. These abilities are not cosmetic. They are tuned to fill a specific combat or traversal gap, such as a short charge that breaks a shield, a leaping dismount strike, or a sprint that ignores soft terrain. The ability is the reason the tier is worth pursuing: stat parity alone would not justify the cost of acquisition.
Breeding and lineage
Legendary mounts can be paired at the stable, but the offspring do not inherit the legendary label. The pairing instead produces a foal with a high chance of an “elite” prefix and a small chance of a second legendary roll under specific conditions that the in-game journal documents but does not guarantee. Players chasing a duplicate legendary through breeding are playing a long odds game and should plan for the resource cost, not a single afternoon at the stable.
Capture requirement
Standard horses can be calmed and saddled with basic items. Legendary mounts require a preparation quest, a specific type of bait, a temporary debuff applied to the target, and a timed taming check. The exact recipe is tied to a story chapter, so a player who tries to engage with the legendary tier before the right chapter will see the relevant NPCs but not be able to complete the capture.
How to prepare before you attempt a legendary tame
Going in unprepared is the most common way to lose progress on a legendary tame. The mount is not killed when the tame fails, but the cooldown on the bait and the loss of the debuff consumables make each attempt cost real time. The preparation list below is the minimum the in-game journal expects before a first serious attempt.
- Reach the chapter that unlocks the legendary tame questline for the target you want.
- Stock at least three full sets of the recommended bait type in your pack or horse inventory.
- Carry the debuff consumable and any throwable needed to apply it from range.
- Repair all gear to at least 80% durability so a failed attempt does not also leave you under-equipped.
- Set a camp marker or fast-travel point near the spawn area to recover between attempts.
- Clear nearby standard enemies so they do not interfere with the tame channel.
Two of those points deserve more attention. First, the bait is not interchangeable: each legendary mount type has a preferred food group, and using the wrong bait drops the success window dramatically. Second, the camp marker is the single biggest quality-of-life gain, because failed tames push you back to the nearest settlement otherwise, and that round trip adds minutes to every retry.
The main legendary mounts and where to look for them
Crimson Desert has several named legendary mounts, and Pearl Abyss has been deliberate about keeping each one tied to a specific biome and a small set of spawn conditions. The table below lists the main entries, the biome where they appear, the preparation hook that unlocks the tame, and a one-line note on the practical role each mount plays. Always confirm the current spawn rules in-game, because the studio has tuned capture conditions during post-launch patches.
| Mount | Primary biome | Unlocking quest or chapter | Main role |
|---|---|---|---|
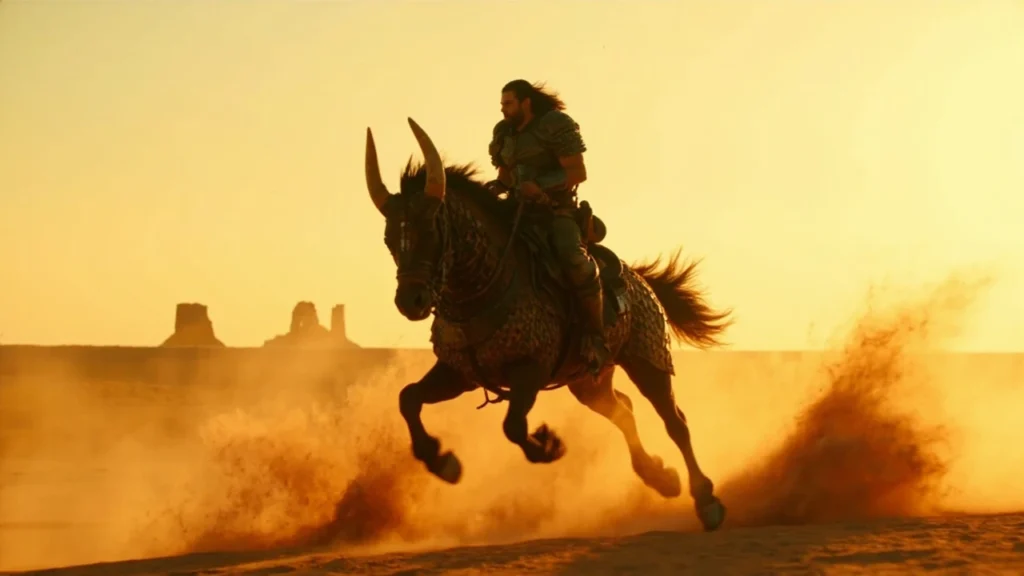
| Armored War Beast | Open desert plains and mesa edges | Chapter tied to the southern caravan arc | Frontline charge and elite enemy breaking |
| Stormmane Charger | Highland passes and cliffside roads | Chapter tied to the mountain monastery arc | Traversal on uneven terrain, anti-archer skirmish |
| Ashmane Strider | Volcanic ridges and cooled lava flats | Chapter tied to the forge-town storyline | Fire-resistant traversal, sustained chase combat |
| Silentstep Dromedary | Deep dunes and salt flats | Optional contract unlocked at the desert bazaar | Long-range travel, low-noise approach for stealth |
| Tidecrest Courser | Coastal cliffs and tidal caves | Chapter tied to the harbor city arc | Shore combat, mounted finisher against groups |
These are the entries the current build exposes. Pearl Abyss has a track record of adding additional named mounts through seasonal content rather than at launch, so the right mental model is that the list above is the foundation, not the ceiling. Players who want the earliest taste of the system should target the Armored War Beast, because the southern caravan arc runs earlier than the mountain, forge, or harbor arcs. Players who already know they prefer one biome over another can wait for the matching quest contract and skip the rest.
Armored War Beast
The Armored War Beast is the closest thing Crimson Desert has to a “default” legendary mount, in the sense that the unlock arc sits early enough that most players meet the conditions before the mid-game. It is heavy, slow to turn, and tuned for straight-line charges against single high-health targets. In large group fights the charge can be used to scatter lighter enemies, but the recovery animation is long enough that poor timing leaves the rider exposed. A useful habit is to lead with a regular horse, trigger the enemy’s shield stance, and swap to the War Beast only when the elite is already committed to the parry window. That way the charge lands against a planted target rather than a moving one.
Stormmane Charger
Stormmane is built around elevation. The traversal advantage shows up on cliffside roads and the highland monastery region, where regular horses struggle with the slope and the narrow switchbacks. In combat the mount’s ability is a downward slam that catches enemies below the rider’s elevation, which makes it strong against archers on ridges and weak in flat arenas. Players who skip the mountain monastery chapter and try to ride Stormmane into the desert will find that the slam rarely connects, because the open ground does not give the ability the geometry it wants.
Ashmane Strider
Ashmane exists for the volcanic biome, and the value is not just damage. The fire resistance on the mount lets the rider cross lava-adjacent terrain that other mounts refuse to enter, and a few of the late-game forge-town quests assume the player can move through that area on Ashmane rather than on foot. The combat ability is a sustained aura rather than a single burst, which rewards players who stay mounted through a fight. The trade-off is that the aura draws a lot of attention from ranged elites, so a rider who plans to use it for more than thirty seconds should already have a path back to cover mapped out.
Silentstep Dromedary
Silentstep is the quiet option. It does not win a straight fight, but it lets the player cross long dune sections without triggering the camp-raid enemy waves that key off loud travel, and its ability is a short window during which dismounted attacks do not break stealth. For players who want to clear the desert bazaar contracts without engaging every patrol, it is the right pick. It also makes a good secondary mount, because it can be parked at the bazaar while a more aggressive legendary is used in the field.
Tidecrest Courser
Tidecrest is the coastal pick. Its ability is a mounted finisher that catches a group of three or more low-health enemies and converts the kill into a brief group heal for the rider. It is the most situational of the five and rewards players who learn the patrol paths around the harbor city, rather than players who wander the coast. On a first visit to the harbor arc, the Courser feels underwhelming; on a third or fourth pass, after the player knows where the patrols bunch up, it becomes one of the smoother mounts in the game.
Step-by-step: a first legendary tame
The exact recipe changes per mount, but the structure is consistent. The walkthrough below is the Armored War Beast flow, and the other legendary tames follow the same shape with a different bait type and a different debuff tool.
- Reach the southern caravan chapter and accept the “Bait and Scent” side contract from the caravan master.
- Purchase the recommended bait from the caravan quartermaster or craft it at a nearby camp if the recipe is unlocked.
- Travel to the marked spawn area during the day, since the mount sleeps through the night and cannot be engaged until it wakes.
- Place the bait inside the lure ring highlighted by the quest marker and step back to the safe distance the journal specifies.
- Wait for the mount to enter the lure ring and start feeding, then throw the debuff consumable at the marked weak point.
- Approach from the side indicated by the journal prompt, begin the tame channel, and keep the integrity bar above the fail threshold by reacting to the on-screen directional inputs.
- On success, mount immediately, ride to the nearest stable master, and register the mount before the timer expires.
Two failure modes dominate. The first is approaching from the wrong side: the directional input during the channel rotates based on the rider’s relative position, and approaching head-on turns the inputs into camera spins. The second is ignoring the soft timer. Once a legendary mount is tamed, it is not automatically added to the stable. There is a short window in which the new mount must be registered, and missing that window sends the animal back to the wild and starts the capture cooldown from zero. Players who want a margin of safety can pre-register a stable slot the night before and use a fast-travel point to skip the long ride after the channel ends.
Costs, upkeep, and the stable economy
A legendary mount is not a one-time purchase. The table below breaks the ongoing cost categories into clear buckets so a player can budget around them rather than discovering the second cost after the first.
| Cost category | What it covers | Typical cadence | Practical note |
|---|---|---|---|
| Stable fees | Daily care, feed, and recovery | Paid in-game per real day | Fees scale with mount tier; legendary stables cost roughly three to four times a standard slot. |
| Gear and saddle | Armor plating, saddle bags, charm | Replaced every few chapters or on tier upgrade | Gear is mount-specific and does not transfer to a regular horse. |
| Repair and recovery | Reviving the mount after a KO in the field | Per death or near-death event | Failing to revive in time can downgrade the mount’s bond level. |
| Bait and consumables | Re-attempting a failed tame | Per failed attempt or breeding cycle | Stock in advance: most legendary bait recipes have multi-hour cooldowns. |
| Stable upgrades | Increased slot count and faster recovery | One-time per stable, gated by story | Worth completing before a second legendary acquisition. |
The bond level is the line item that most players miss. Bonding is not a single checkbox; it is a five-step ladder that increases the mount’s base stats, lowers the chance of misbehavior during dismount, and unlocks the unique active skill at the top step. The only reliable way to raise bond is repeated riding, mounted combat, and feeding the mount its preferred food. Camping without riding for several real days can quietly lower the bond and reset progress on the ladder. A practical rule of thumb is to ride the legendary at least once per in-game day for ten minutes, and to feed it a preferred-food item at the end of each ride. That schedule keeps the bond stable through long stretches of off-mount content.
How legendary mounts change combat and traversal
The cleanest way to think about the impact is to split it into two domains: traversal, where legendary mounts are a quality-of-life upgrade, and combat, where they are a build choice. Confusing the two leads to bad advice.
Traversal
On traversal, a legendary mount is faster, more durable across long distances, and able to ignore certain terrain that would dismount a standard horse. The Silentstep Dromedary and the Ashmane Strider are the clearest examples: both are biome-locked traversal tools that solve a specific problem the map would otherwise force the player to solve on foot. For pure speed across open ground, the difference between a well-bonded legendary and a top-tier regular horse is smaller than the marketing suggests. The real gain is the route options, not the raw pace.
Combat
On combat, the gap is wider. Legendary mounts are designed to be part of the encounter plan, not just transportation into the encounter. The unique ability on each legendary is tuned to interact with elite enemy patterns. The Armored War Beast charge breaks shield stances that the player cannot break from the ground. The Stormmane slam punishes archers on elevation. The Ashmane aura lets the player stay mounted through waves that would normally force a dismount. None of those interactions are guaranteed wins, but each one opens a tactical option that a standard horse simply does not have. A rider who ignores those options and treats the mount as a taxi is leaving the most useful tool in the kit on the bench.
Common mistakes when chasing a legendary mount
Most failed attempts come from a small set of predictable errors. Listing them explicitly makes them easier to avoid.
- Trying to tame at the wrong time of day, when the mount is sleeping and immune to bait.
- Using a generic bait rather than the mount-specific preferred food.
- Ignoring nearby standard enemies, which break the tame channel when they aggro.
- Failing to register the mount at the stable before the soft timer expires.
- Letting the bond decay by leaving the mount at a stable for too long without riding.
- Chasing a duplicate legendary through breeding without budgeting for the low success rate.
Each of those errors is recoverable, but the recovery cost is real. Players who want a clean first run should treat the list as a pre-flight check rather than a post-mortem. The time of day and the bait type are the two checks most often skipped, because both feel like flavor until the channel fails. A good habit is to read the relevant journal entry twice before the first attempt, since the journal lists both the bait family and the wake window in the same paragraph.
How legendary mounts compare to standard and elite mounts
Players often ask whether the legendary tier is worth the cost compared to a high-bond elite mount. The honest answer depends on what the player wants from the game.
| Attribute | Standard mount | Elite mount | Legendary mount |
|---|---|---|---|
| Top speed | Good | Very good | Marginally higher than elite |
| Base stat ceiling | Low | Mid | High |
| Unique active skill | None | None | One mount-specific ability |
| Breeding value | Low | Useful for stable diversity | High initial cost, slow payoff |
| Capture difficulty | Simple | Moderate | Multi-step, time-gated |
| Best use case | Early traversal, backup slot | Main ride through the mid-game | Late-game content, elite hunts, story bosses |
The pattern is clear. The jump from standard to elite is a quality-of-life improvement. The jump from elite to legendary is a build decision, and the build is more about the active skill than the stat sheet. A player who is happy with their elite mount and only runs open-world content will feel the legendary tier as extra cost with no clear return. A player who plans to push the elite hunts and the late story bosses will feel the active skill as the difference between a clean clear and a long retry.
What a legendary mount cannot do
It is just as important to understand the limits. The system has clear boundaries that protect the rest of the game balance.
- Legendary mounts do not enable content that is otherwise locked. The unlock conditions are quest-based, not mount-based.
- The unique ability has a real cooldown and a stagger window on the rider when interrupted. It is not a panic button.
- Breeding from a legendary does not produce another legendary reliably. Expect elite offspring with a small chance of a second roll.
- Legendary mounts share the same summoning rules as standard mounts in instanced dungeons, meaning some encounters will despawn the mount at the door.
- Stable fees apply even while the mount is parked, so owning more than two legendaries at once has a real ongoing cost.
Those boundaries matter because they keep legendary mounts from trivializing content. They are a tool, not a shortcut past the game’s design. A common trap is to assume that a legendary is the only mount worth keeping once acquired; in practice, the legendary is most useful when paired with a strong elite that can cover the instanced content the legendary is not allowed into.
Designing a loadout around a legendary mount
Once a player has a legendary mount, the next decision is how to build the rider around it. The right loadout depends on the mount’s ability, because the ability sets the rhythm of the fight.
- Pick the ability that defines your plan. A charge-based legendary pairs with mid-range weapons that can punish a scattered enemy group. A slam-based legendary pairs with a shield setup that lets the rider survive a counter-strike after the slam lands.
- Carry a fast-disarm consumable. Legendary abilities attract elite aggro, and the recovery animation is the most common window in which a player is punished.
- Use a saddle charm that extends the mounted damage window rather than one that boosts raw damage. The window is the bottleneck, not the swing.
- Match your camp location to the legendary’s biome. A legendary is most useful where it can stay mounted, not where the player keeps dismounting.
- Plan a fallback mount. Instanced content and certain boss arenas force a dismount, and a strong elite mount is a better fallback than a legendary that will be despawned at the door.
Loadout choices that look strong on paper often fall apart in the recovery window. The most common mistake is to stack damage charms and then lose the damage window to a stagger the player did not expect. A second common mistake is to forget that the legendary’s ability has a wind-up. Players who chain the ability into a weapon swing without respecting the wind-up will see the swing cancel and the cooldown reset, which feels like a bug but is intended behavior.
When to wait on a legendary tame
Not every player should rush the legendary tier. The system rewards preparation, and forcing it too early costs more than it saves. The cases below are the right situations to wait.
- The player has not finished the chapter that unlocks the relevant quest contract.
- The stable has fewer than two free slots, because a failed registration sends the mount back to the wild.
- The player is short on the recommended bait type and cannot replenish it before the spawn window.
- The player’s main weapon is not yet at the level where the legendary’s ability meaningfully changes the fight.
- The player is partway through a long quest chain that would force a despawn of the mount on entry.
Waiting in those cases is not a setback. It is the cheapest way to avoid losing bait, consumables, and a chapter’s worth of time to a single failed channel. A useful framing is to treat the legendary tame the same way a player would treat a boss fight: do not engage until the prep is done, and accept that “later” is sometimes the right answer.
How legendary mounts fit into the broader game loop
Legendary mounts are one of several long-tail progression tracks in Crimson Desert, alongside gear crafting, camp upgrades, and companion relationships. The tracks share resources, so a player who over-invests in mounts will feel the squeeze on the other tracks. The honest read on the economy is that a single legendary, kept at high bond, is enough to clear all of the mount-relevant content. A second legendary is a comfort pick, not a power pick, and a third is a luxury that only pays off in very specific elite-hunt strategies.
Players who like to optimize one track at a time can treat the legendary mount as a mid-game goal: finish the southern caravan arc, take the Armored War Beast, and spend the rest of the chapter raising bond. By the time the late-game arcs open, the legendary is already at the top of the bond ladder and the player can switch focus to gear or camp upgrades without losing the mount’s value. Players who prefer to spread resources can wait until the late game and pick the legendary that matches the content they actually want to run, which avoids the cost of a mount that does not fit the planned build.
Troubleshooting the most common legendary mount issues
Even with a clean preparation list, a few specific issues show up often enough to be worth a short section. The fixes below come from the current in-game support docs and the post-launch patch notes.
- If the bait does not register inside the lure ring, the player is probably too close to the ring’s edge. The bait needs to be at the center marker, not within the visible outline.
- If the debuff consumable does not stick, the player is probably throwing it during the mount’s idle animation instead of its feeding animation. Wait for the head to dip before throwing.
- If the integrity bar collapses late in the channel, the player is probably ignoring the second directional input. The channel has two inputs, not one, and the second one is shorter and easier to miss.
- If the mount disappears after a successful tame, the player missed the registration timer. The mount is gone for the rest of the spawn cycle, but the quest contract reoffers on a long cooldown.
- If the bond stalls at step three of five, the player is probably feeding the right food too rarely. Bond gain from feeding is small per item, so the practical fix is to feed in batches after a long ride rather than a single item per rest.
Most of those issues have in-game tooltips, but the tooltips are written for players who have already seen the system once. On a first attempt, the bait and debuff timing are the two checks that catch new players, because the timing windows are narrower than the early-game tame contracts that the player has already cleared.
Frequently asked questions
Are legendary mounts missable in Crimson Desert?
Each legendary mount is tied to a specific story chapter or a specific optional contract. The contract versions can be missed if the player skips the relevant bazaar or settlement, but Pearl Abyss has historically added catch-up hooks at later stables for players who have already passed the relevant NPC. The story-locked versions do not need a catch-up because they re-offer the capture contract on a long cooldown until the tame succeeds.
Can a legendary mount die permanently?
No. A downed legendary mount enters a recovery state and can be revived at the stable or in the field with the right consumable. Repeated deaths lower the bond level, and a fully decayed bond can downgrade the mount to elite tier. The fix is straightforward: ride the mount, feed it, and clear the recovery penalty at a stable before it stacks.
Do legendary mounts carry over into New Game Plus?
Mounts registered at a stable are tied to the account, not the playthrough. New Game Plus starts the player with their stable roster intact, including bond progress on registered legendary mounts. Items stored in saddle bags do not carry over and must be re-staged.
Is it worth breeding legendaries for a second one?
Only if the player already has stable upgrades and a comfortable supply of bait. The expected number of breeding cycles to roll a second legendary is high, and each cycle consumes resources that could be spent on a different capture contract. The honest framing is that breeding is a side project, not the primary path to a second legendary mount.
Which legendary mount is best for solo players?
For solo play, the Armored War Beast is the most forgiving option because its charge gives the player a reliable way to create distance from a group. The Ashmane Strider is a strong alternative for players who spend most of their time in volcanic content. The Silentstep Dromedary is the best pick for players who prefer stealth contracts over direct combat.
Do legendary mounts affect romance or companion content?
Specific companions react to the mount the player is riding, but the reactions are flavor rather than gate conditions. No companion quest line requires a particular legendary mount, and the player does not lose or gain relationship points based on the choice of mount.
How long does a legendary tame usually take on a first attempt?
From the first bait placement to the stable registration, a clean first attempt on the Armored War Beast takes roughly twenty minutes, including travel. Failed attempts add the time it takes to restock bait and travel back to the spawn area, which is why a nearby camp marker is the single biggest time saver on the path.
Will future updates add more legendary mounts?
Pearl Abyss has added named mounts through seasonal content rather than at launch, and the development team has hinted at additional biome-locked entries tied to post-launch regions. The right assumption is that the current roster is the foundation, and the broader roster will arrive over the game’s first year of updates.
Can two players co-op a legendary tame?
The tame channel is solo, but a co-op partner can clear surrounding enemies, apply the debuff from a second angle, and shorten the recovery between failed attempts by reviving the rider. The capture itself cannot be split, so the credit goes to the player who finishes the channel.
What is the fastest way to raise bond once I have a legendary?
Long mounted rides through the mount’s preferred biome, paired with the mount’s preferred food, raise bond the fastest. A standing camp with the mount parked nearby raises bond much more slowly and can decay if the player ignores the mount for several real days.